
Rear plate Z-6 heads and brake pop
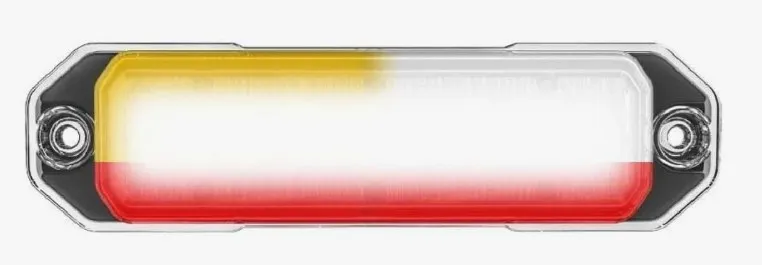
Two SpeedTech Z-6 heads on a plate bracket at the rear. Amber/clear warning on slide 2/3, and steady red while braking, read over OBD-II with the Whelen CC5K1 kit. A front Super Takedown version is planned for later.
Legal notice
Emergency lighting and siren use is regulated by state law and permits. This page documents a personal build and is not legal guidance.
Two small warning heads at the rear plate that flash amber/clear with the rest of the system, and switch to steady red whenever the brake pedal is pressed. The brake signal comes from the truck’s data bus, so no brake wire is tapped. Done means the bracket is on, both heads are wired and synced, and brake pop works in the truck.
Constraints
Section titled “Constraints”- No drilling. The bracket’s long piece goes on with the existing rear plate screws.
- No brake wire tap. The brake is read over OBD-II with the Whelen CC5K1 CANport kit.
- Module model matters. Whelen’s price list (PL18.1CT) lists the CANport OBD-II interface only in the CANWCT3 module, and the OBDII Communication board is optional (guide 14C81C). Brake pop depends on reading the module’s label.
- Plate legibility: the bracket and heads must not cover any plate characters or the state name. Check the current state rule.
- Steady burn: SpeedTech says not to run steady burn more than an hour.
| Part | SKU | Price | Key specs | Source | Status |
|---|---|---|---|---|---|
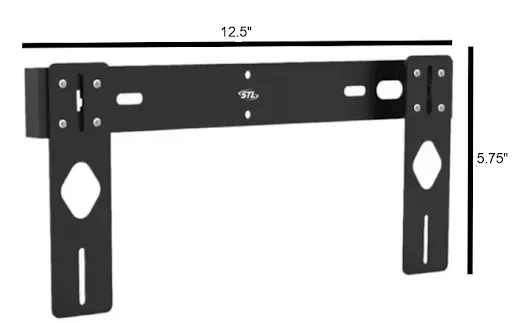
| SpeedTech Lights License Plate Bracket | Q-LPB | $19.99 | 12.5" W x 5.75" T, 3 black powder-coated pieces | Source | In progress |
| SpeedTech Lights Brake Light (Secondary Red) Z-6 TIR LED Surface Mount Warning Light Head (Dual Memory), Amber Clear (x2) | TBD | $119.98 for two | 12V, under 0.5A each, 12 LEDs | TBD | In progress |
| Whelen Carbide CanTrol OBDII CANport Kit For CCSRN5 (CC5K1 - Ford) | CC5K1 | $52.98 | Bought new 21 Oct, arrived 26 Oct (in hand). OBD-II pass-through, 8-pin plug to the CanTrol | TBD | In progress |
The bracket and heads were one order at speedtechlights.com on 18 October, with a discount code and free shipping.
License plate bracket
Section titled “License plate bracket”SpeedTech Lights License Plate Bracket
- SKU
- Q-LPB
- Size
- 12.5 in wide x 5.75 in tall (SpeedTech Support email, 8 Oct). Amazon's 3 x 15 in is wrong
- Kit
- Three black powder-coated pieces (one long, two short) plus hardware, 2 lb (Amazon)
- Material
- Unconfirmed. Amazon specs say aluminum; its photos suggest steel
- Warranty
- 5 years
- Fits on the sides
- Z-3, Z-4 and Z-6 TIR; Multicolor Z-6, Z-8 and Z-12 Linear
- Top only
- Z-12 TIR and Multicolor Z-24 Linear (10 in, too long for the sides)
Source: SpeedTech Lights listing and SpeedTech Support (email, 8 Oct 2026)
The long piece goes on with the existing plate screws. Each light bolts to a short piece with its own hardware, and the short pieces bolt to the long piece. Lights hang vertically on the two side pieces or horizontally along the long piece. The plan is one Z-6 on each side piece.
Checks on the truck before final mounting:
- No plate characters or the state name are covered.
- The top piece and lights don’t shadow the factory plate lamps.
- The trailer socket door opens, and a plug fits with a light on the left side.
- The spare tire release stays reachable.
Z-6 heads
Section titled “Z-6 heads”SpeedTech Z-6 TIR Brake Light (Secondary Red), Amber Clear
- Size
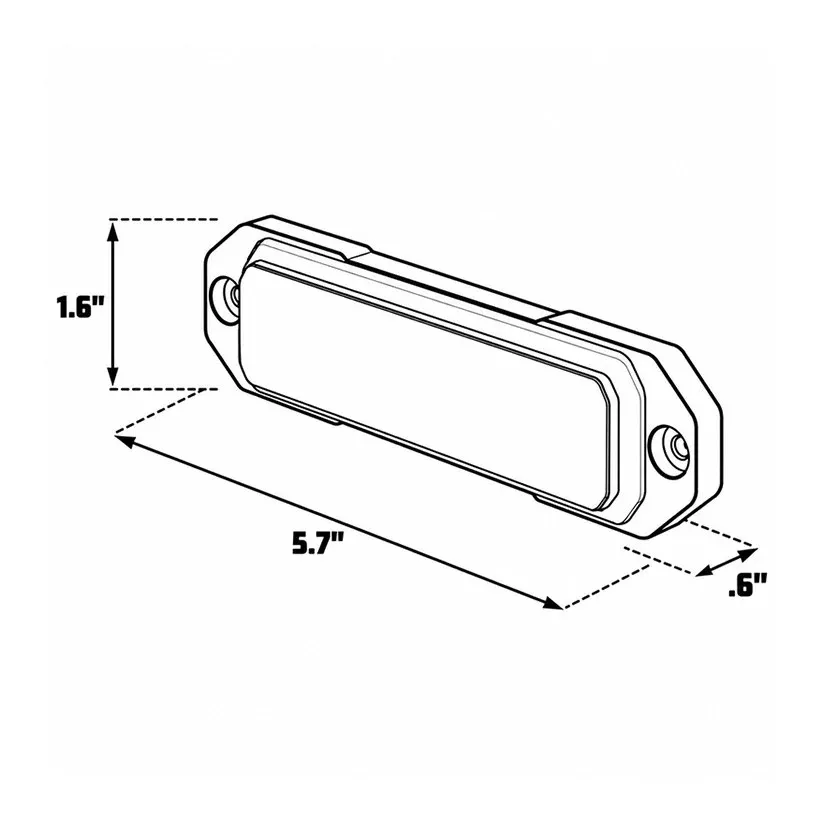
- 5.7 in long x 1.6 in tall x 0.6 in deep, two screw ears
- Power
- 12V DC, under 0.5A each
- LEDs
- 12 (the standard Z-6 has 6)
- Cable
- 1 ft
- Patterns
- 24, plus 3 alternating-sync patterns
- Memory
- Dual memory
- Included
- Foam pad per head; the cable passes through its center hole
- Manual
- Z-6 TIR Brake manual G-TZTBL6 (matches the standard Z-6 manual G-TZTSTD6)
Source: SpeedTech Lights manual G-TZTBL6 and drawing
Wiring
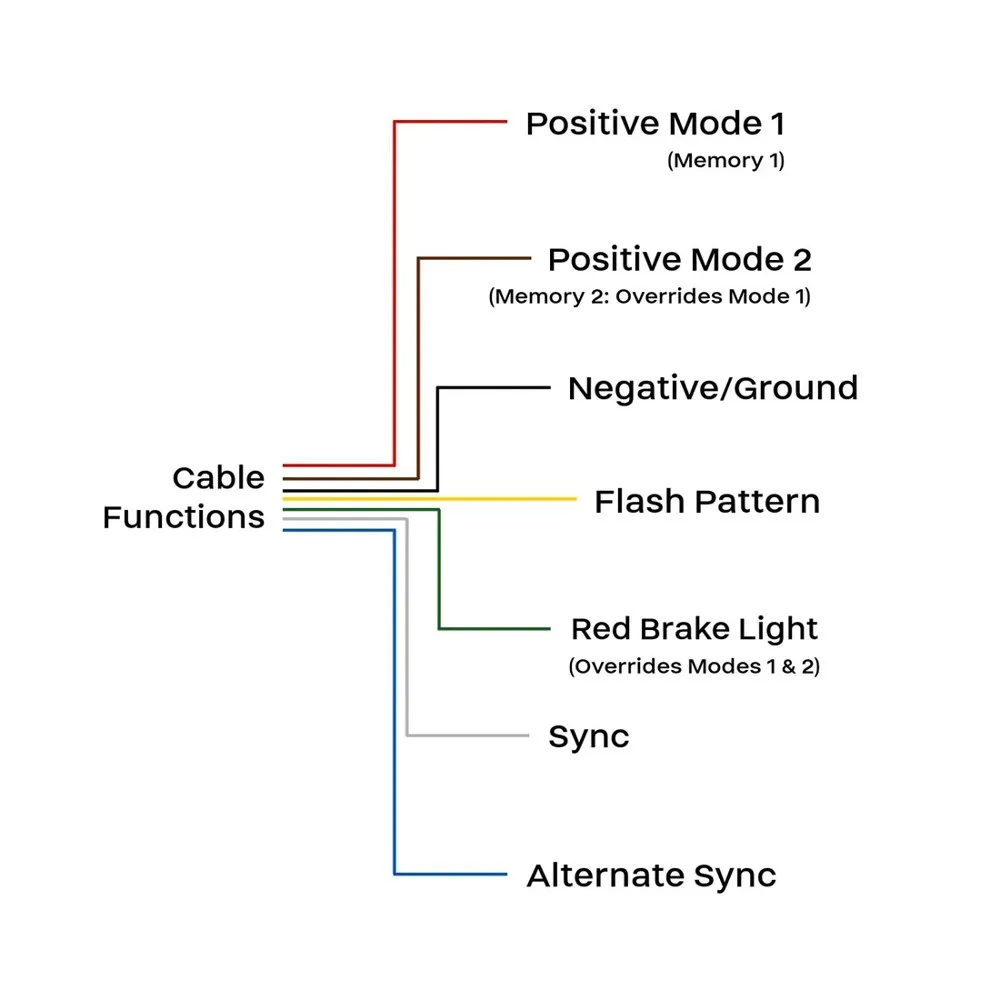
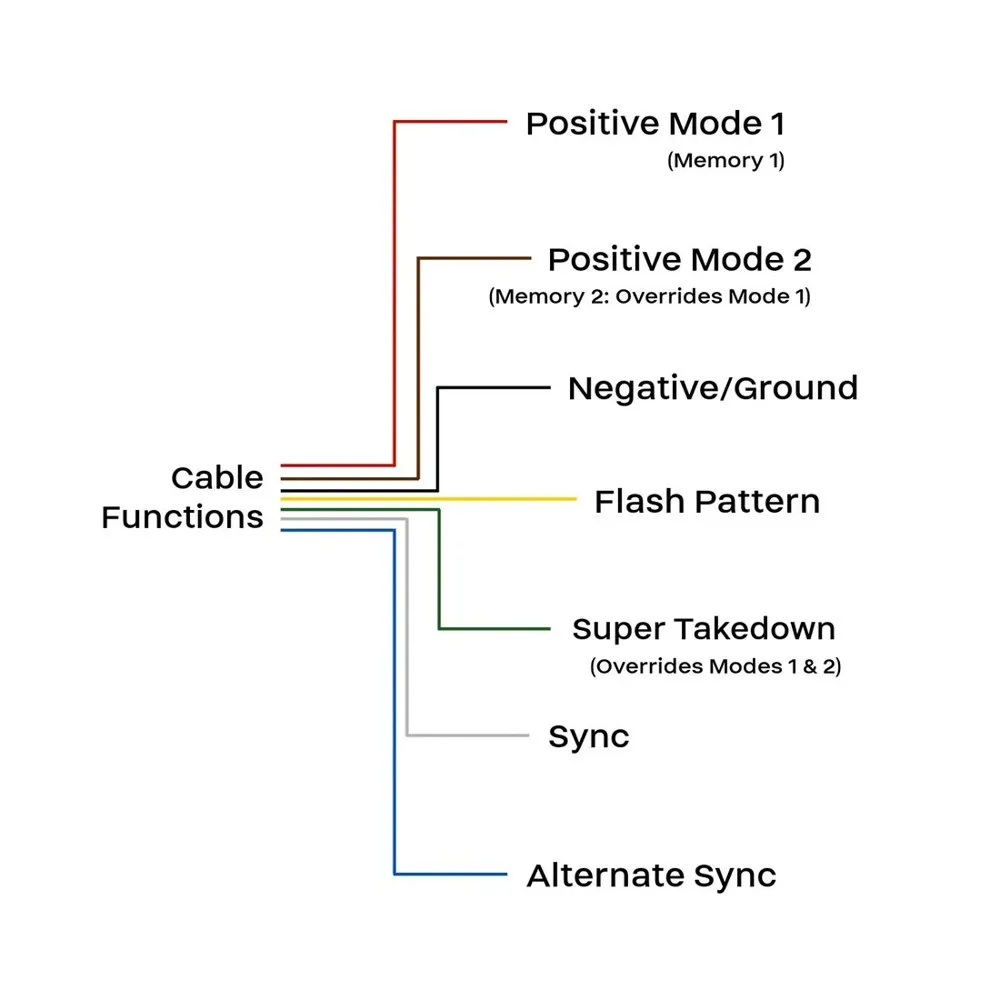
Section titled “Wiring”| Wire | Function (SpeedTech chart) | Connects to |
|---|---|---|
| Red | Positive Mode 1 (Memory 1) | LED Output 12, both heads (M1). Slide 2/3 |
| Brown | Positive Mode 2 (Memory 2, overrides Mode 1) | Capped (M6) |
| Black | Negative / ground | Frame rail at the rear (M4) |
| Yellow | Flash pattern | Joined to the other head’s yellow for sync, then the pair capped (M5) |
| Green | Red brake light (overrides Modes 1 and 2) | LED Output 13, both heads (M2): brake pop |
| Grey (white in the manual) | Sync, max 8 units | Joined left to right (M5) |
| Blue | Alternate sync | Capped (M6) |
| Wire | Color | Function | Source output | Draw | Fuse | Gauge | Relay pin | Termination | Ground |
|---|---|---|---|---|---|---|---|---|---|
| M1 | Red (both heads) | Mode 1, amber/clear warning | LED Output 12, slide 2/3 | Under 0.5A each (manual). Measure | LED output 2.5A, 20A group | 18 AWG | — | Spliced at the rear | TBD |
| M2 | Green (both heads) | Red brake, overrides Modes 1 and 2 | LED Output 13, on while braking (CANport) | Measure | LED output 2.5A | 18 AWG | — | Spliced at the rear | TBD |
| M3 | CC5K1 harness | Brake status from the vehicle bus | Truck OBD-II port under the dash | Data only | — | Kit cable | — | Pass-through OBD-II socket; 8-pin plug into the OBDII Communication board next to the module USB port | TBD |
| M4 | Black (both heads) | Ground | — | Return | — | 18 AWG | — | Ring terminal, can share the T7 point | Steel frame rail near the rear bumper. Never battery negative |
| M5 | Grey to grey, yellow to yellow | Sync, flash together | — | — | — | 18 AWG | — | Sealed splices | TBD |
| M6 | Brown and blue (each head) | Not used | — | — | — | — | — | Capped separately. Blue only for alternating-sync programming | TBD |
| M7 | M1 + M2 | Run to the rear plate | Amplifier area | — | — | In the T8 loom | — | Through the bracket grommet holes | TBD |
Brake pop with the CanTrol
Section titled “Brake pop with the CanTrol”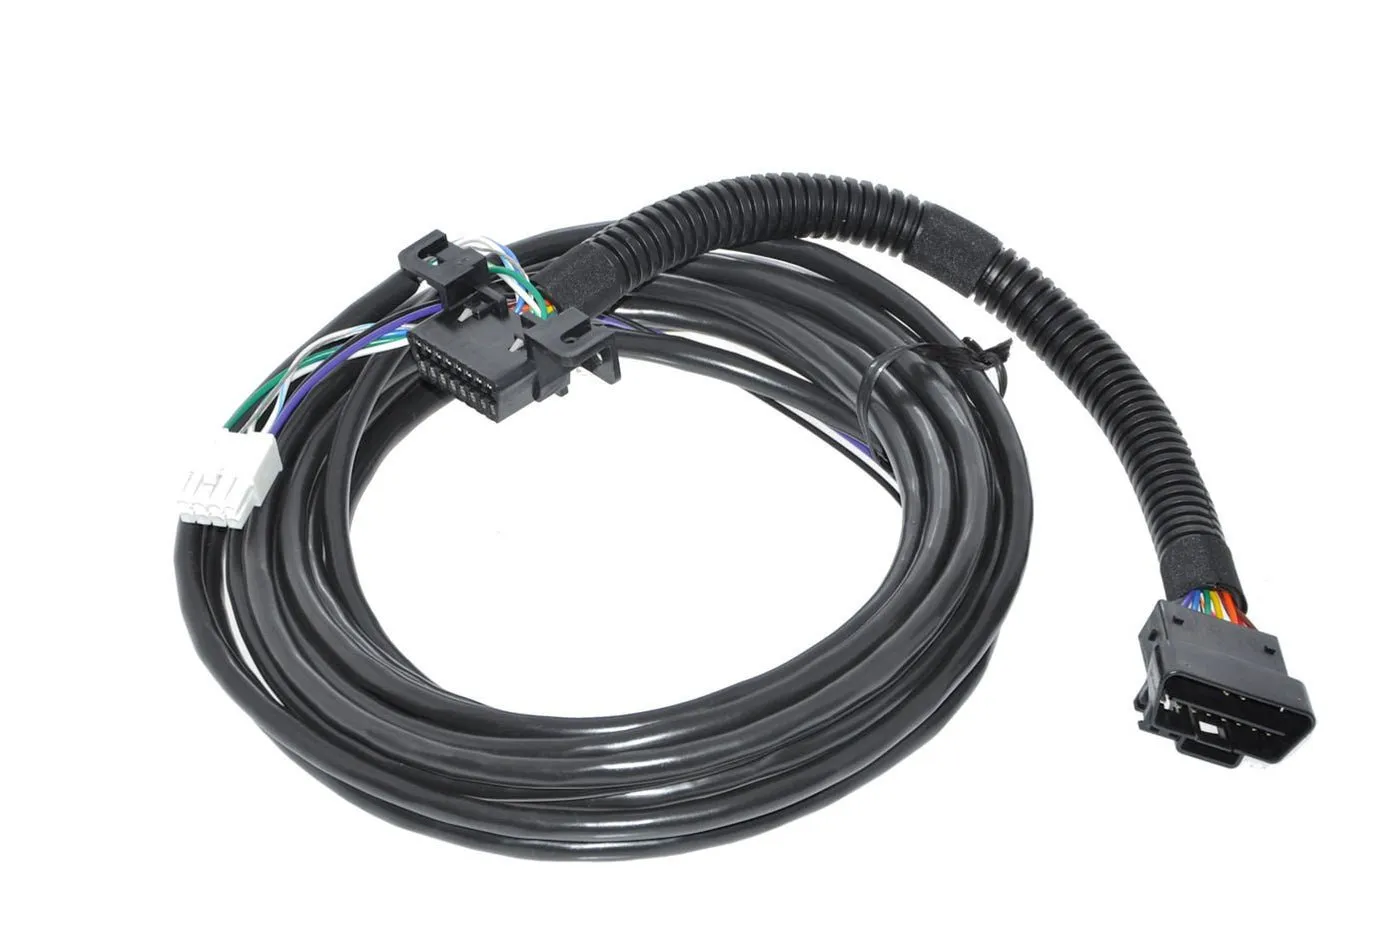
- Brake signal in. The CanTrol reads the brake pedal from the truck’s own data bus through the CC5K1 kit. Its OBD-II plug goes into the truck’s port under the dash. A pass-through OBD-II socket on short leads keeps the port free for scan tools, and the kit’s male OBD-II connector mounts next to the truck’s port with the supplied hardware. Its 8-position connector plugs into the OBDII Communication board inside the CanTrol module, the small 8-pin header next to the USB port (Whelen guide 14C81C p.2). Data only, no power or ground wires. Install with the truck off.
- Warning. LED Output 12 on slide 2/3 drives both red (Mode 1) wires: the amber/clear pattern saved in Memory 1.
- Pop. In Whelen Command, add the vehicle under CANport, select the brake signal and program LED Output 13 to turn on while the brake is pressed, only when the slide switch is on (the default; it can be set to work at all times). LED Output 13 drives both green wires, which override the warning modes, so the heads go steady red while braking.
- Sync (manual G-TZTBL6 p.4). Set both heads to the same pattern, join the sync wires (grey on SpeedTech’s chart, white in the manual) and join the yellows, then power off and on. For left/right alternating, also program the blues: one head’s blue to +12V for about 3 s (Group A), the other’s for about 5 s (Group B), then power cycle. Once synced, a tap of the joined sync wires to +12V switches to alternating, and a 2 s hold switches back.
Unverified
Brake pop needs a CANWCT3 module, and Whelen Command has to list Brake for the 2017 F-150 (Command added 2017 to 2019 F-150 CANport support in v1.1.2.0). My copy of the Command guide doesn’t name a “brake pop” setting, so the exact menu is inferred until I see it on the laptop.
Bench test on 12V before mounting
Section titled “Bench test on 12V before mounting”- SUPERNIGHT 12V supply, 3A fuse in a Nilight in-line holder on the feed. Black to supply −. The manual’s bench test is red and black only.
- Red to +: the warning pattern runs. Touch yellow to + to step patterns and stop on the one wanted. Holding yellow 2 s toggles steady burn (don’t run steady over 1 hour) and 3 s toggles auto-cycle (manual G-TZTBL6 p.7). Power off and on to confirm Memory 1 keeps it.
- With red on, add green to +: the head should go red. Record the draw on red and on green (meter in series).
- Both heads on the same pattern, sync wires joined and yellows joined, power cycled: confirm they flash together.
- Write the draws and the pattern here. Two heads at under 0.5A each use well under 1A of the 2.5A LED output.
Changes to the install config
Section titled “Changes to the install config”| Row | Before | Now |
|---|---|---|
| LED Output 12 (2.5A) | Spare | Both Z-6 red (Mode 1), slide 2/3 |
| LED Output 13 (2.5A) | Spare | Both Z-6 green (red brake). Brake pop from the brake read over OBD-II |
| CANport | Unused | CC5K1 kit to the truck OBD-II port (brake status) |
| Rear loom | T1 + T2 | Adds M1 and M2 to the same run to the rear bumper |
Red to the rear is normal for brake lights, and steady red on braking matches the truck’s own lamps (general knowledge). Flashing amber/clear on a private vehicle is restricted in many states, as for the other warning lights.
Future option: front vanity plate (not bought)
Section titled “Future option: front vanity plate (not bought)”I plan to add this later (decided 18 Oct). The same bracket goes on the front with two Super Takedown Z-6 heads, whose green wire gives a steady white takedown instead of the red brake light.
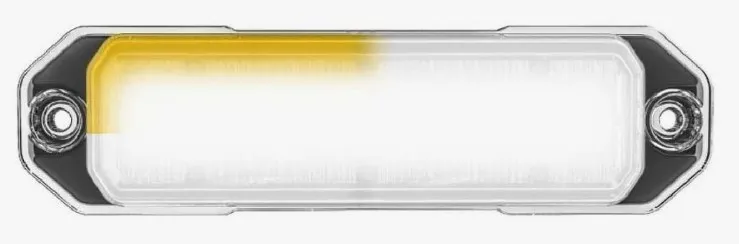
- Parts: 2x SpeedTech Lights Super Takedown (Secondary Clear) Z-6 TIR LED Surface Mount Warning Light Head (Dual Memory), Amber Clear, $119.98 for two, plus one Q-LPB bracket, $19.99 (my cart, 18 Oct).
- Mounting: the bracket’s long piece goes on with the front vanity plate’s own screws; one head on each short side piece, cable through the foam pad and the center hole (manual G-TZTSTD6 p.6). No drilling. Check that the heads clear the grille guard and the tow hooks, and stay clear of the headlamps and the guard lights.
- Specs: 12V DC, under 0.5A each, 1 ft cable, 24 patterns. Sync and pattern steps as above. Ask SpeedTech for the Super Takedown sheet when ordering.
- How it works: slide 2/3 runs the amber/clear pattern on both front heads with the rear heads. The TAKE DOWN button (spare on the 21-button head) turns both to steady white for lighting what’s ahead when stopped. Steady white to the front is generally allowed only within headlamp and auxiliary lamp rules, so use takedown only when stopped (general knowledge).
| Wire | Color | Function | Source output | Draw | Fuse | Gauge | Relay pin | Termination | Ground |
|---|---|---|---|---|---|---|---|---|---|
| N1 | Red (both front heads) | Mode 1, amber/clear warning | LED Output 14, slide 2/3 | Under 0.5A each | LED output 2.5A | 18 AWG | — | Spliced at the front | TBD |
| N2 | Green (both front heads) | Super Takedown, steady white, overrides Modes 1 and 2 | LED Output 15, TAKE DOWN button, latch | Measure | LED output 2.5A | 18 AWG | — | Spliced at the front | TBD |
| N3 | Black (both) | Ground | — | Return | — | 18 AWG | — | Ring terminal | Steel frame rail near the front bumper |
| N4 | Grey and yellow | Sync, flash together (G-TZTSTD6 p.4) | — | — | — | 18 AWG | — | Sealed splices | TBD |
| N5 | N1 + N2 | Run to the front plate | Amplifier area | — | — | Loom | — | Firewall grommet with the guard wires | TBD |
| N6 | Brown and blue (each) | Not used | — | — | — | — | — | Capped separately | TBD |
Open items
Section titled “Open items”- Read the CanTrol module label (CANWCT3 needed) and confirm Whelen Command lists Brake for the 2017 F-150.
- Confirm the bracket material.
- Run the four on-truck mounting checks.
- Measure the head draws on the bench.
Sources
Section titled “Sources”- SpeedTech Lights Z-6 TIR Brake manual G-TZTBL6 and standard Z-6 manual G-TZTSTD6
- SpeedTech Lights Support email, 8 October 2026 (bracket size)
- SpeedTech license plate bracket on Amazon (B01KZ1WD80)
- Whelen CC5K1 install guide 14C81C, Whelen price list PL18.1CT, Whelen Command release notes
- F-150 project document, revision 10, sections 8.4, 8.5 and 9.3 (M1 to M7, N1 to N6)
Changelog
Section titled “Changelog”CC5K1 kit arrived 26 Oct (27 October files).
Rollback: Revert the commit that added the E68Xtreme.
Removed spend, order and group totals (privacy rule). Per-item prices stay.
Rollback: Revert the commit that removed the totals.
Page published from the 23 October project files.
Rollback: Revert the commit that rebuilt the F-150 section.